Appearance
Installation
Follow the steps to install this script on your server.
Note: Before installing the script, we recommend enabling SSL on the domain first.
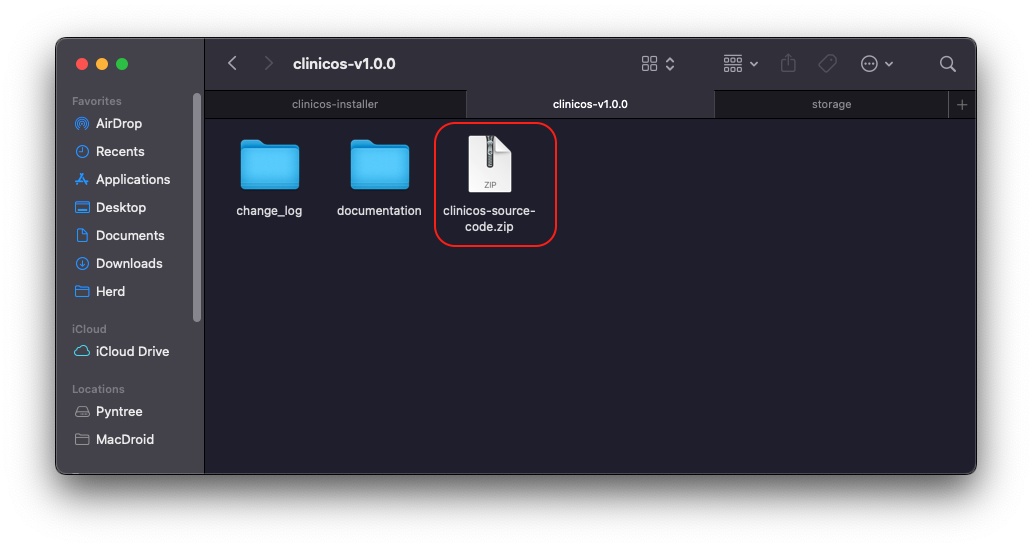
4.1 Downloading the file
After you purchase this script, you will get a zip file. Download the zip file and extract it in your computer.
You will get the file:
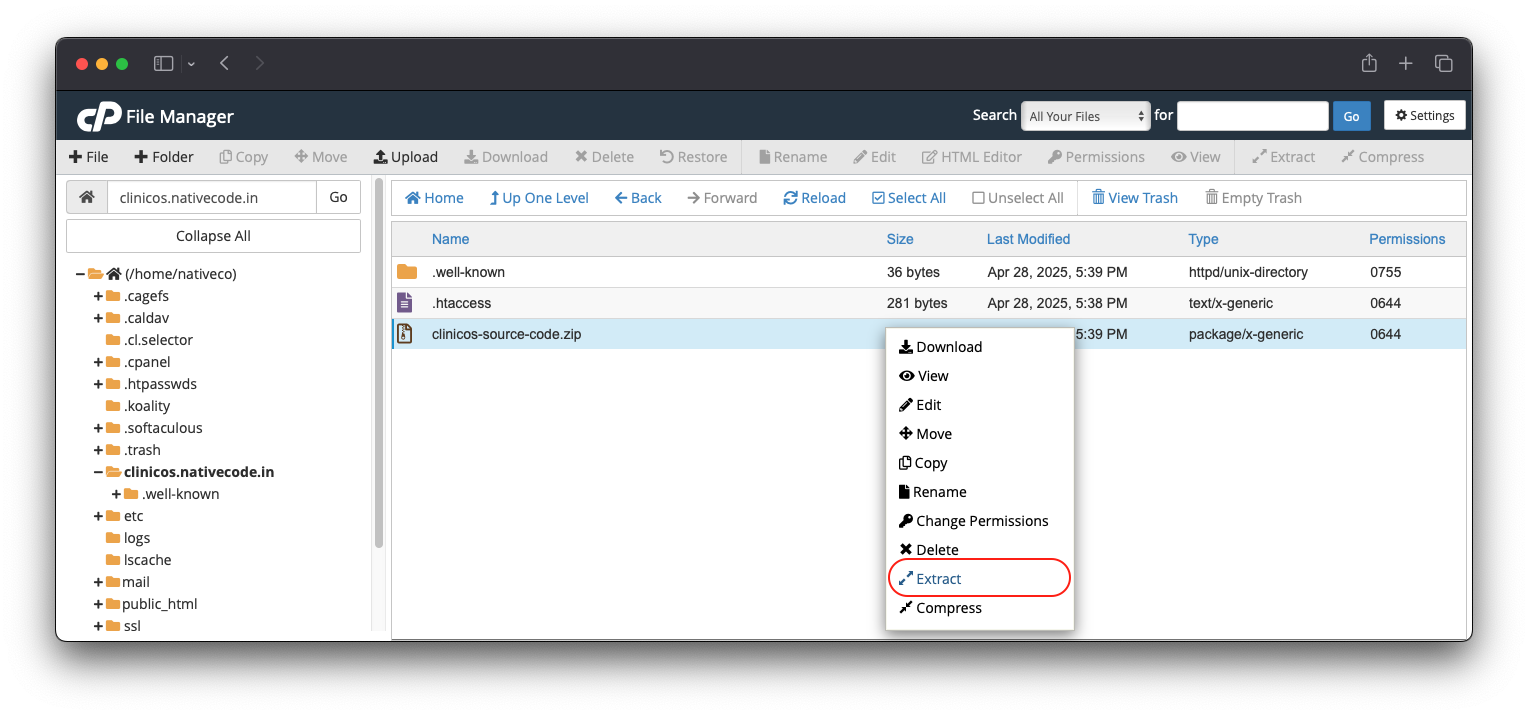
4.2 Extracting the file
Upload:
clinicos-source-code.zip
file in your server and extract it.
Once the extraction process is done, remove:
clinicos-source-code.zip
from your server.
- If you upload and extract it in
public_htmlfolder, then visityour_domain_name.comin browser. - If you upload and extract it in a folder in
public_html, then visityour_domain_name.com/folder_name. - If you upload and extract it in your created subdomain folder, then visit
subdomain.your_domain_name.com. - If you upload and extract it in a folder inside your created subdomain folder, then visit
subdomain.your_domain_name.com/folder_name.
4.3 Installation Wizard
Open your domain URL in another tab. You will see the Installation page.
Note: If you're not getting this installation page, please double check your server requirements and installation steps.
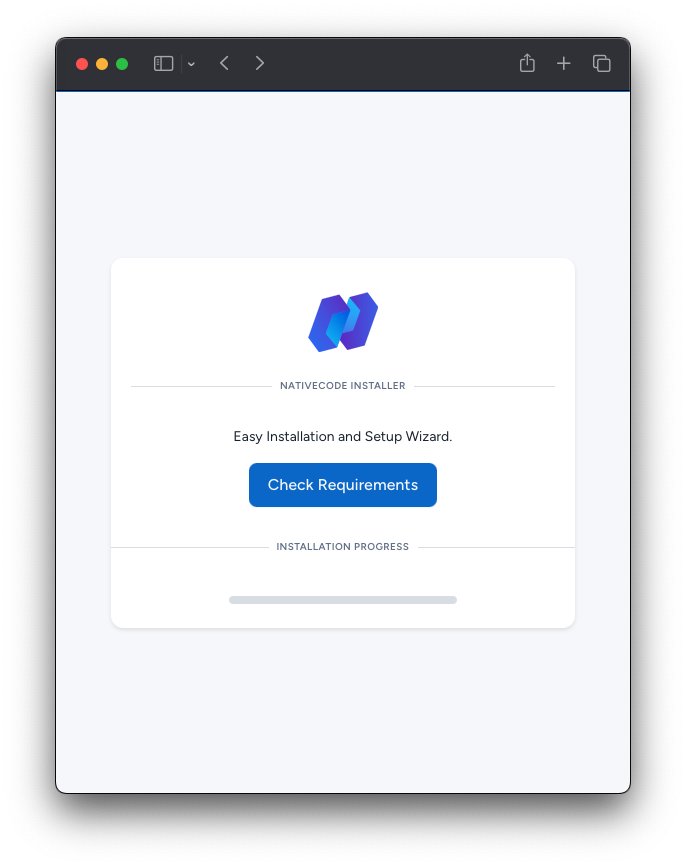
Click Check Requirements button on this page. It will automatically check your server minimum requirements for this installation.
4.4 Checking Server Requirements
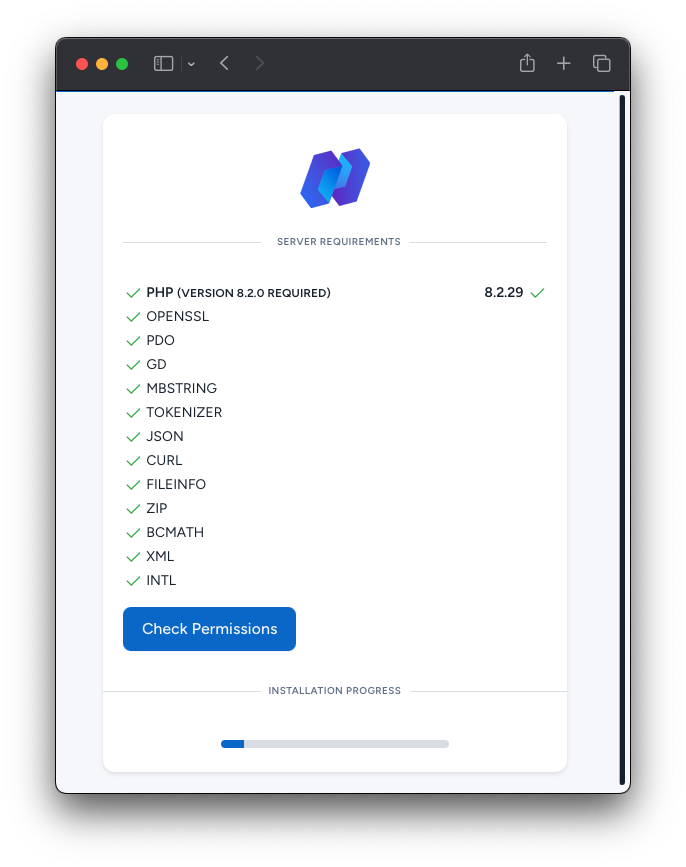
If you get any issues on this page, then you need to enable the appropriate PHP extension on your server. Contact your hosting provider to enable PHP extensions.
Once all requirements are met, proceed to check folder permissions.
4.5 Checking Folder Permissions
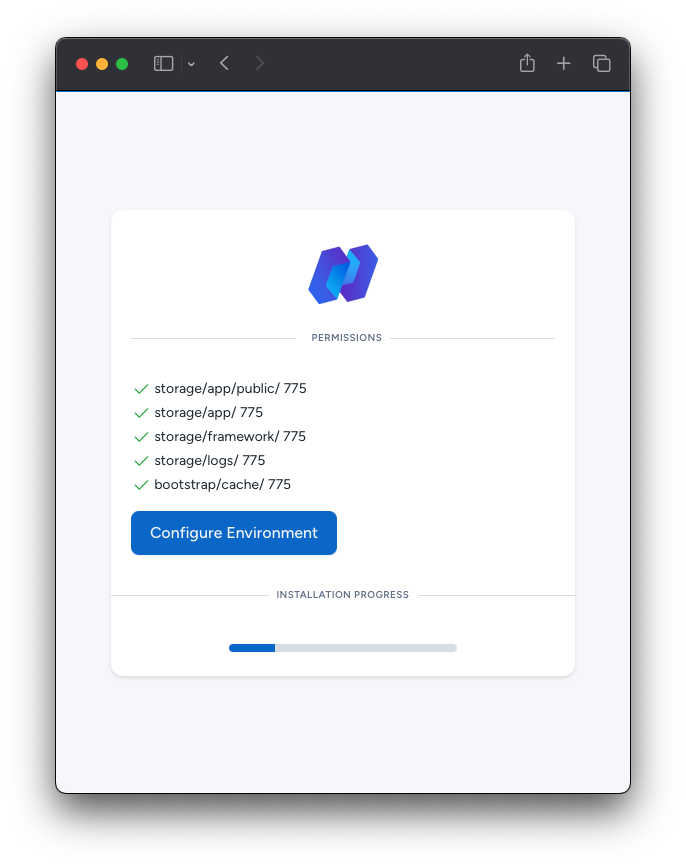
Make sure your folders are readable and writable (775).
If not, check the mentioned folder permissions from your file manager and change them to 775.
Open File Manager in your cPanel → Select storage folder → Click Permissions → Set to 775 and apply to all subfolders.
If you want more clarity, please follow this video tutorial.
4.6 Configuration
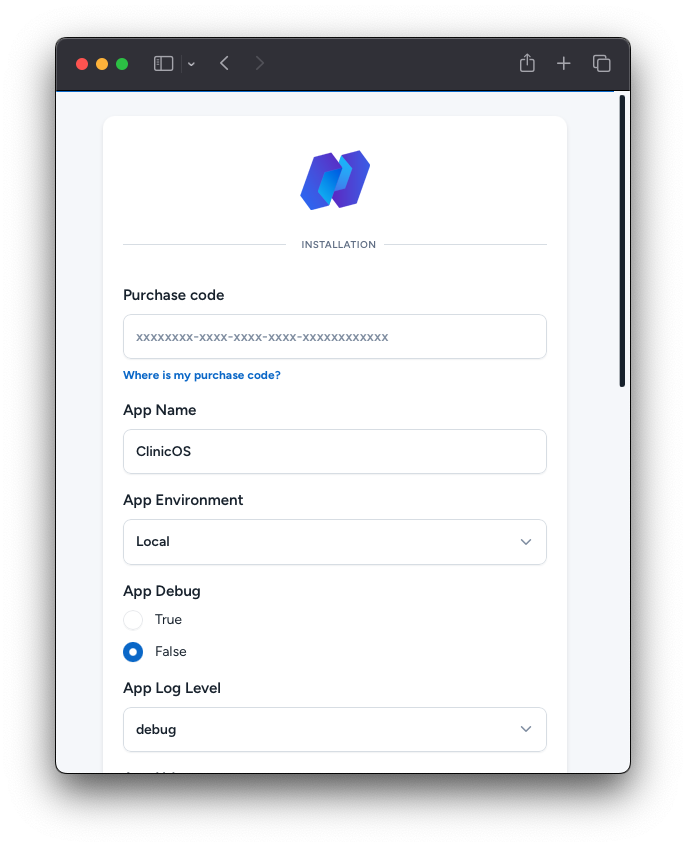
You need to fill the following details on the displayed screen:
- Purchase code
- App Name
- App Environment
- Database Name
- Database User Name
- Database Password
Please make sure your following PHP.ini configurations:
- max_execution_time = 600
- memory_limit = 512M
If you install in a local environment with the artisan command, the artisan server will restart during installation. You may see a connection lost screen for 2-3 seconds. Refresh the page after that.
For Live or local domain installation choose Production.
Then, click on the "Install" button.
4.7 Installation Success
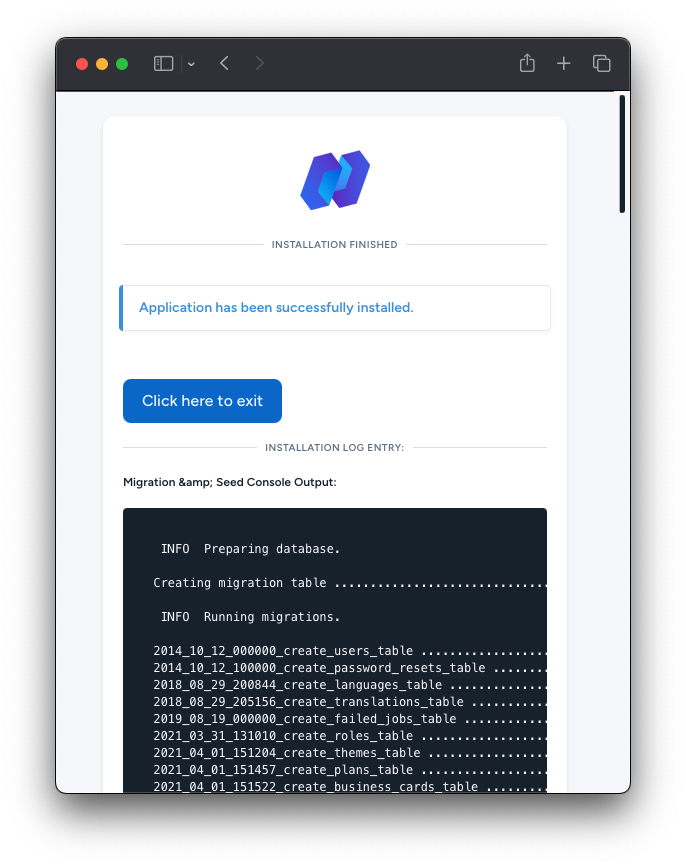
That's it. Your installation is completed. Click on the exit button.
Hurray!
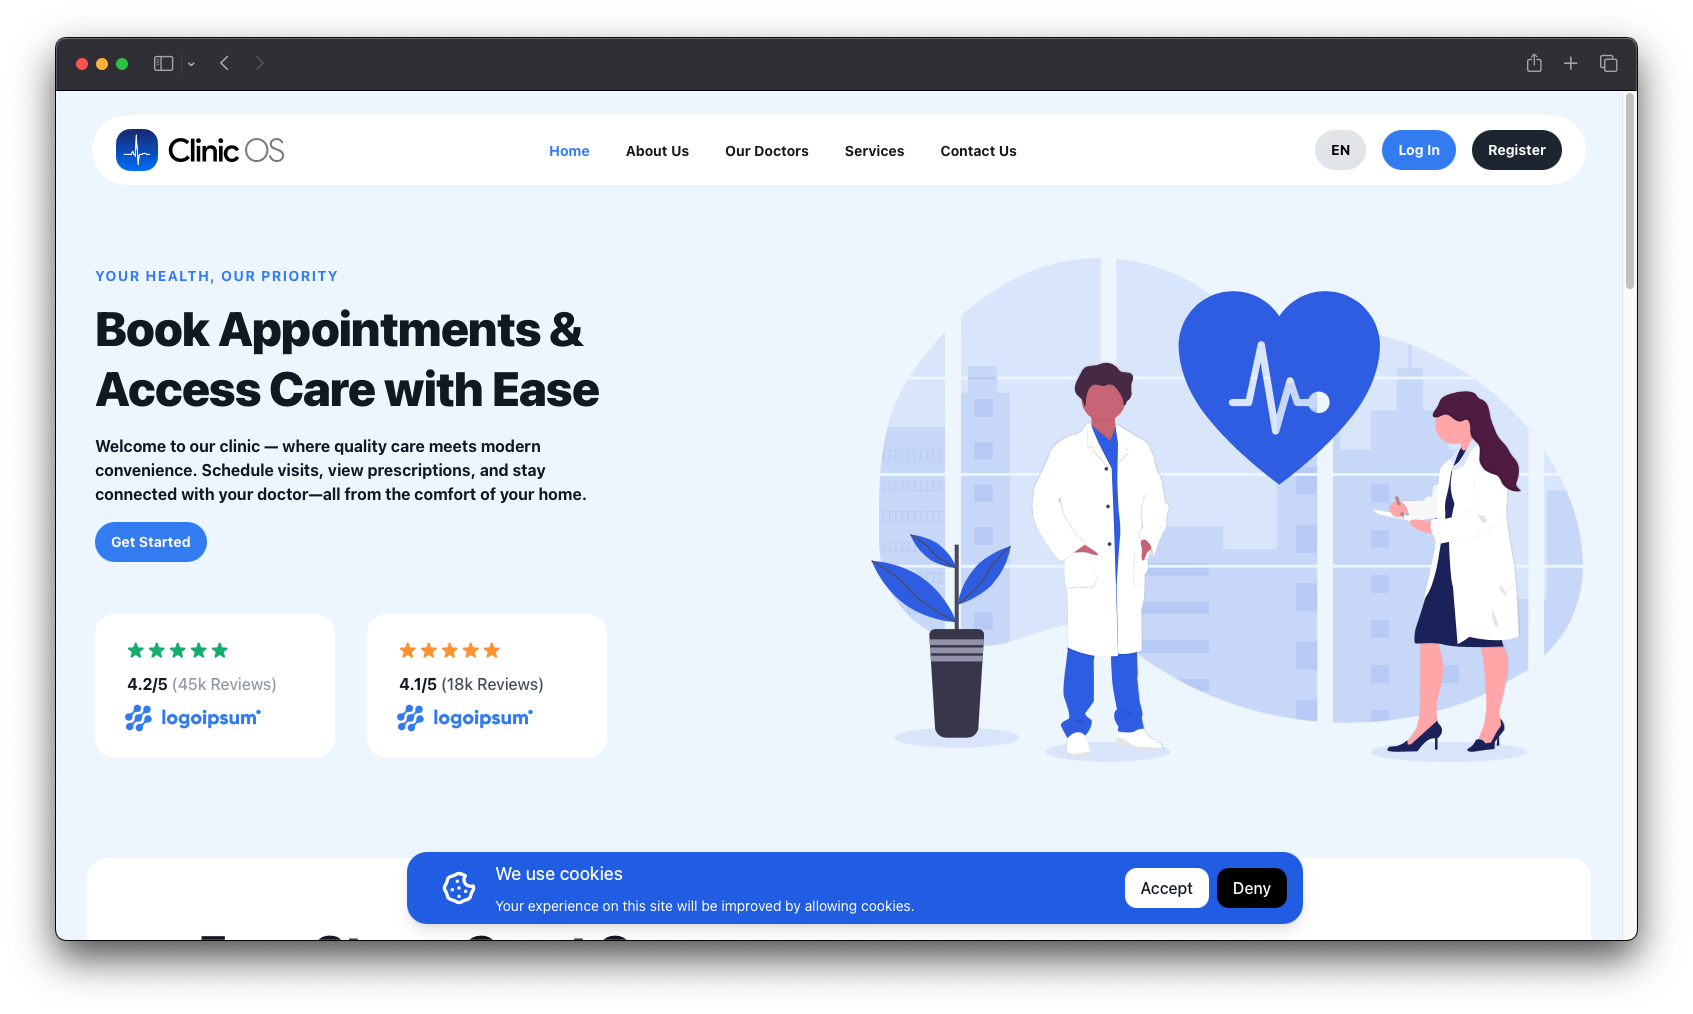
Live Website
Default Login Details
- Login URL:
yourdomain.com/login - Email:
[email protected] - Password:
admin@admin