
Appearance
How to Configure Transaction.cloud
Last update: 06 Nov 2024
Follow the steps below to configure Transaction.cloud as a payment gateway in AI Tools.
Step 1: Create a Transaction.cloud Account
Go to:
Create a new account and complete the account verification process.
Step 2: Create a Product
Open the Products page:
https://app.transaction.cloud/products
Create a new product using One-time Payment.
Fill in the required details, including the product name, price, and description.
After creating the product, copy the Product ID.
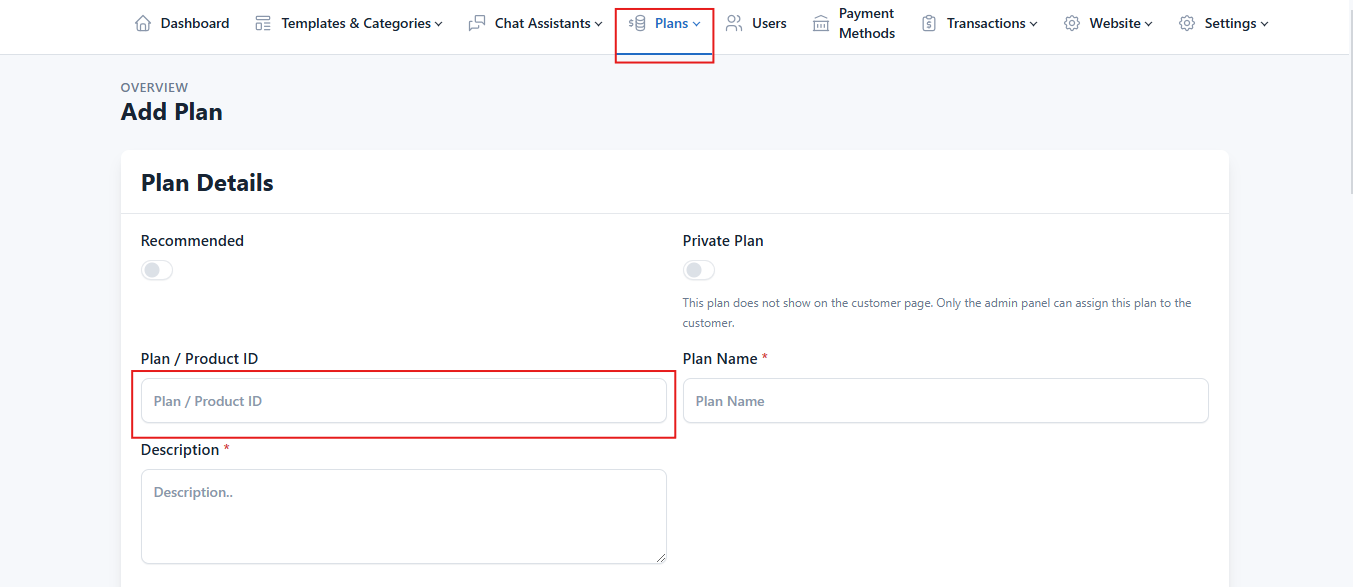
Log in to your AI Tools Admin Panel and navigate to:
Plans -> Add Plan or Plans -> Edit Plan
Paste the Product ID into the Plan ID / Product ID field, then save the plan.
Step 3: Get the API Login and API Password
Open the API Setup page:
https://app.transaction.cloud/api-set-up
Generate your API credentials.
Copy the following values:
- API Login
- API Password
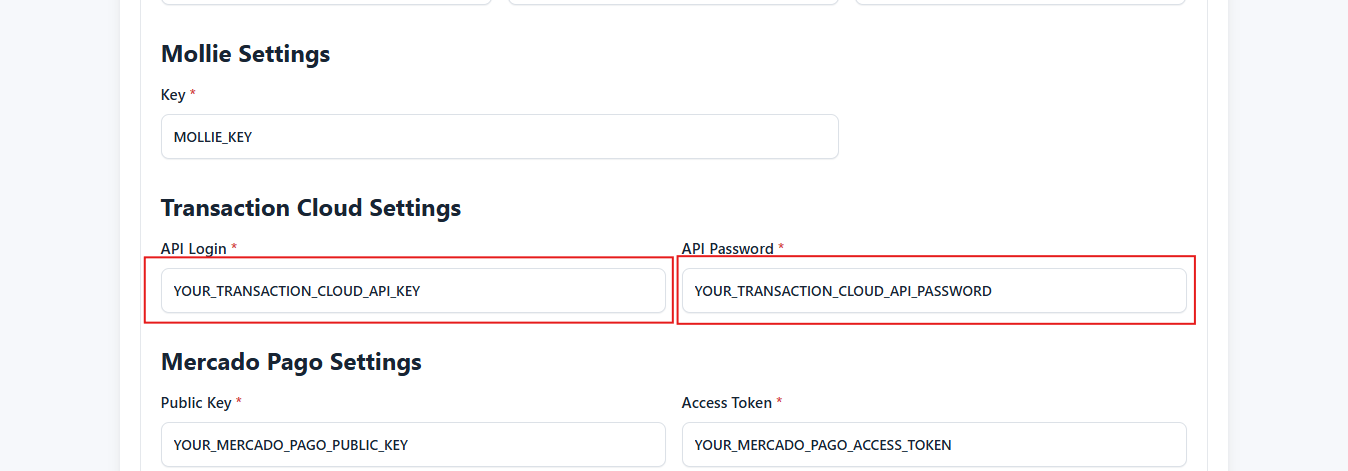
Log in to your AI Tools Admin Panel and navigate to:
Settings -> General Settings -> Payment Methods Configuration Settings
Under the Transaction.cloud settings, paste your:
- API Login
- API Password
Click Update to save the configuration.
Step 4: Configure the Return URL
Set the following Return URL in your Transaction.cloud account:
text
https://yourdomain.com/transactioncloud-payment-status?id=TRANSACTION_IDAlso configure the Products List URL as:
text
https://yourdomain.com/user/plansNote
Replace
yourdomain.comwith your actual domain name.