Appearance
MSG91 SMS Plugin Configuration
Follow these steps to configure the MSG91 SMS plugin and enable SMS notifications.
1. Login to the MSG91 Panel
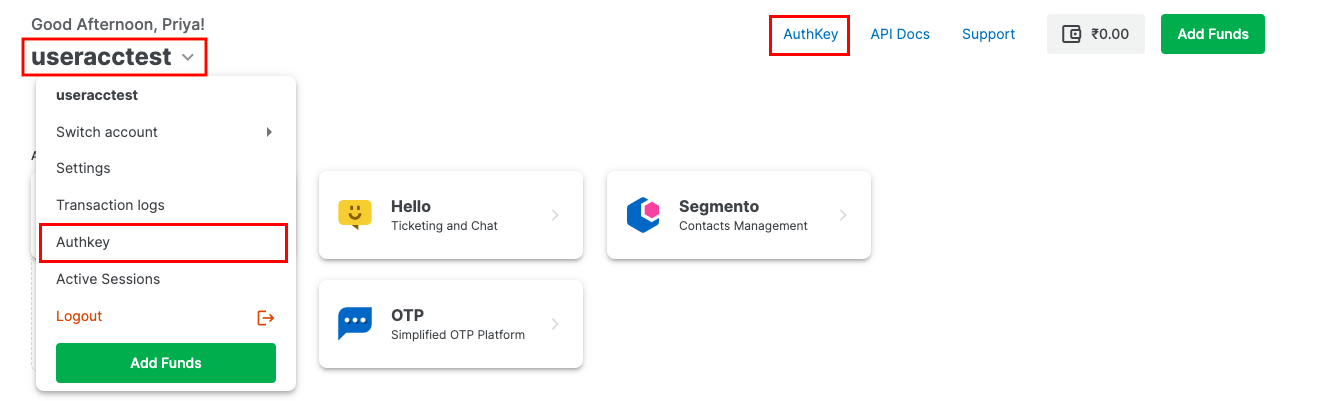
Log in to your MSG91 account. Select the Authkey option from the top row.
You can also find it from the username dropdown or at the bottom left if you are inside any service dashboard.
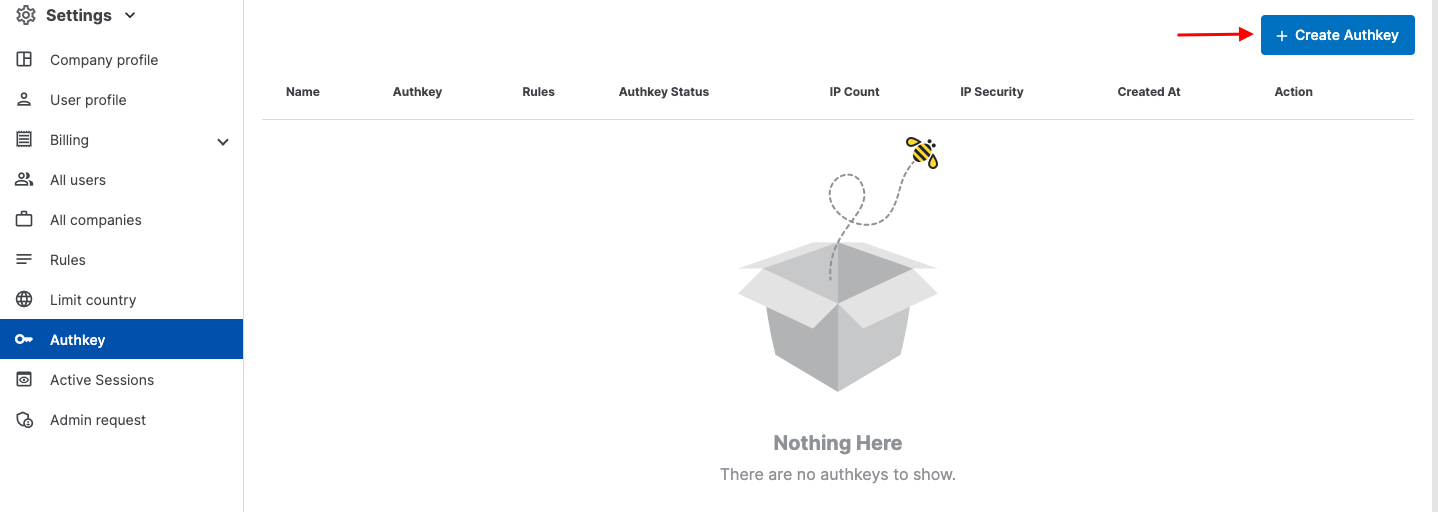
2. Create an Auth Key
Click on the Create New option to create an Authkey.
3. Procedure to Get the Auth Key
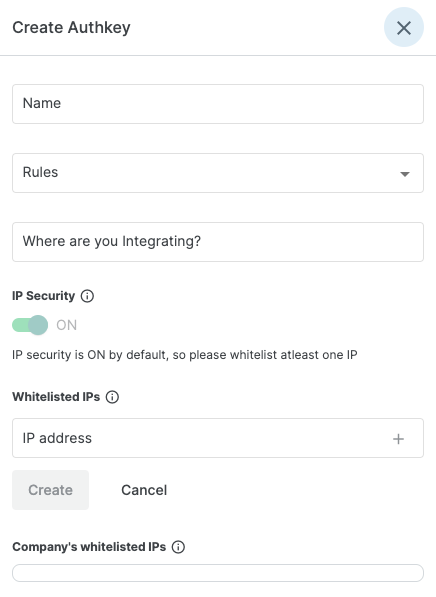
Fill in the required details for your Authkey:
- Authkey Name: Name the Authkey as per your preference. Avoid special characters.
- Use Case: Select the use case in the "Where are you integrating" field or create a new one.
- Rule Selection: Choose the rule from the Rules dropdown. Rules define which services can use this Authkey. You can also create a new rule in the Settings → Rules section.
- IP Security: IP security is on by default. You can disable it if needed. Whitelist your IPs in the Whitelist IPs field. Company whitelisted IPs are visible at the bottom.
Once done, click Create.
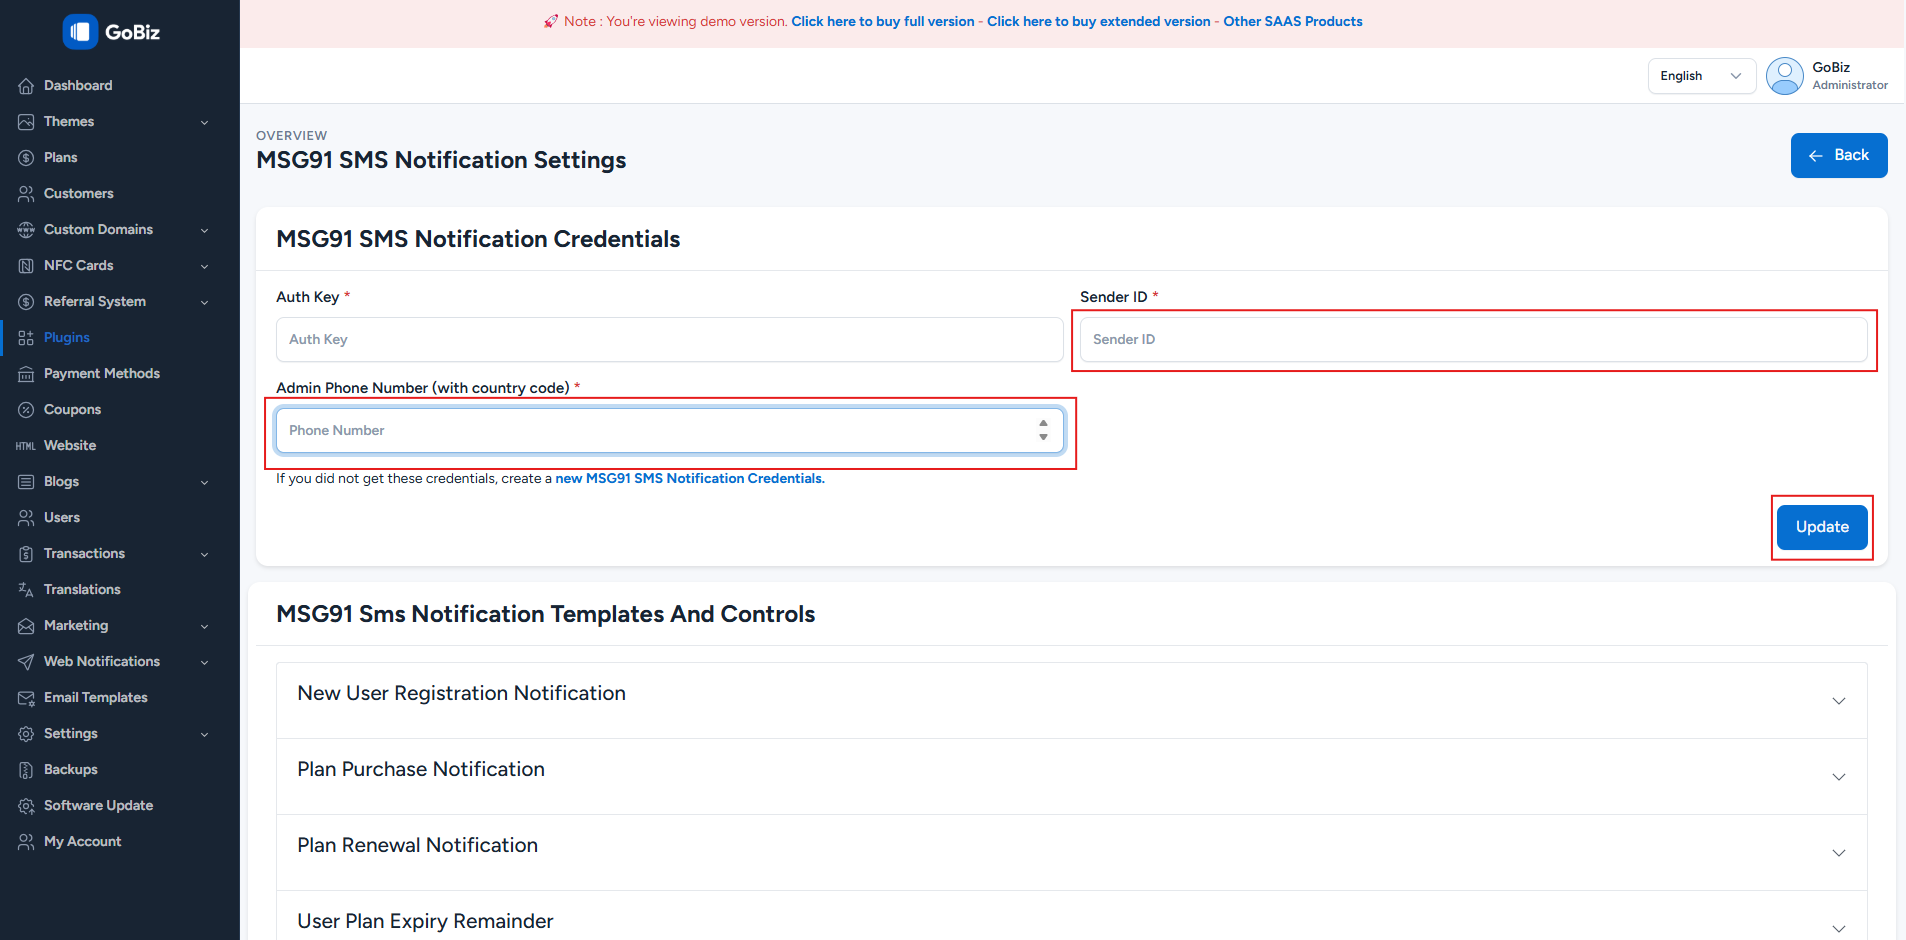
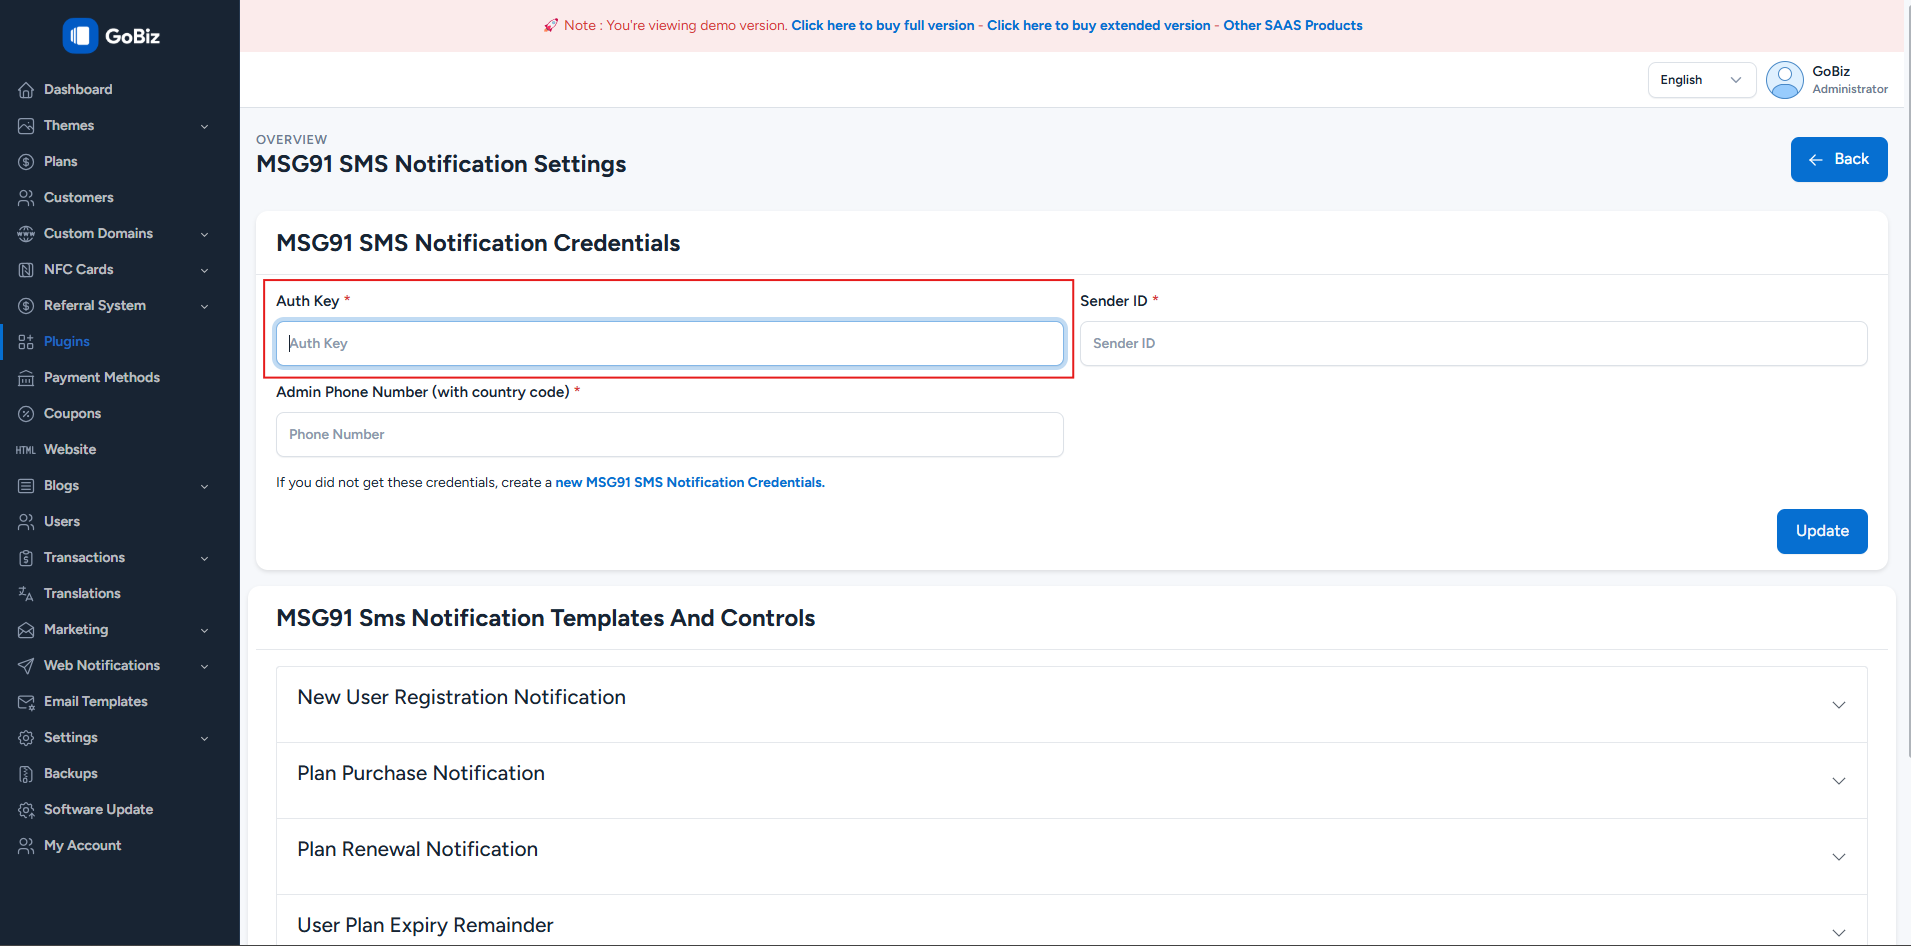
4. Paste the Auth Key in the Admin Panel
Copy the generated Auth Key and paste it into the Settings section of your admin panel.
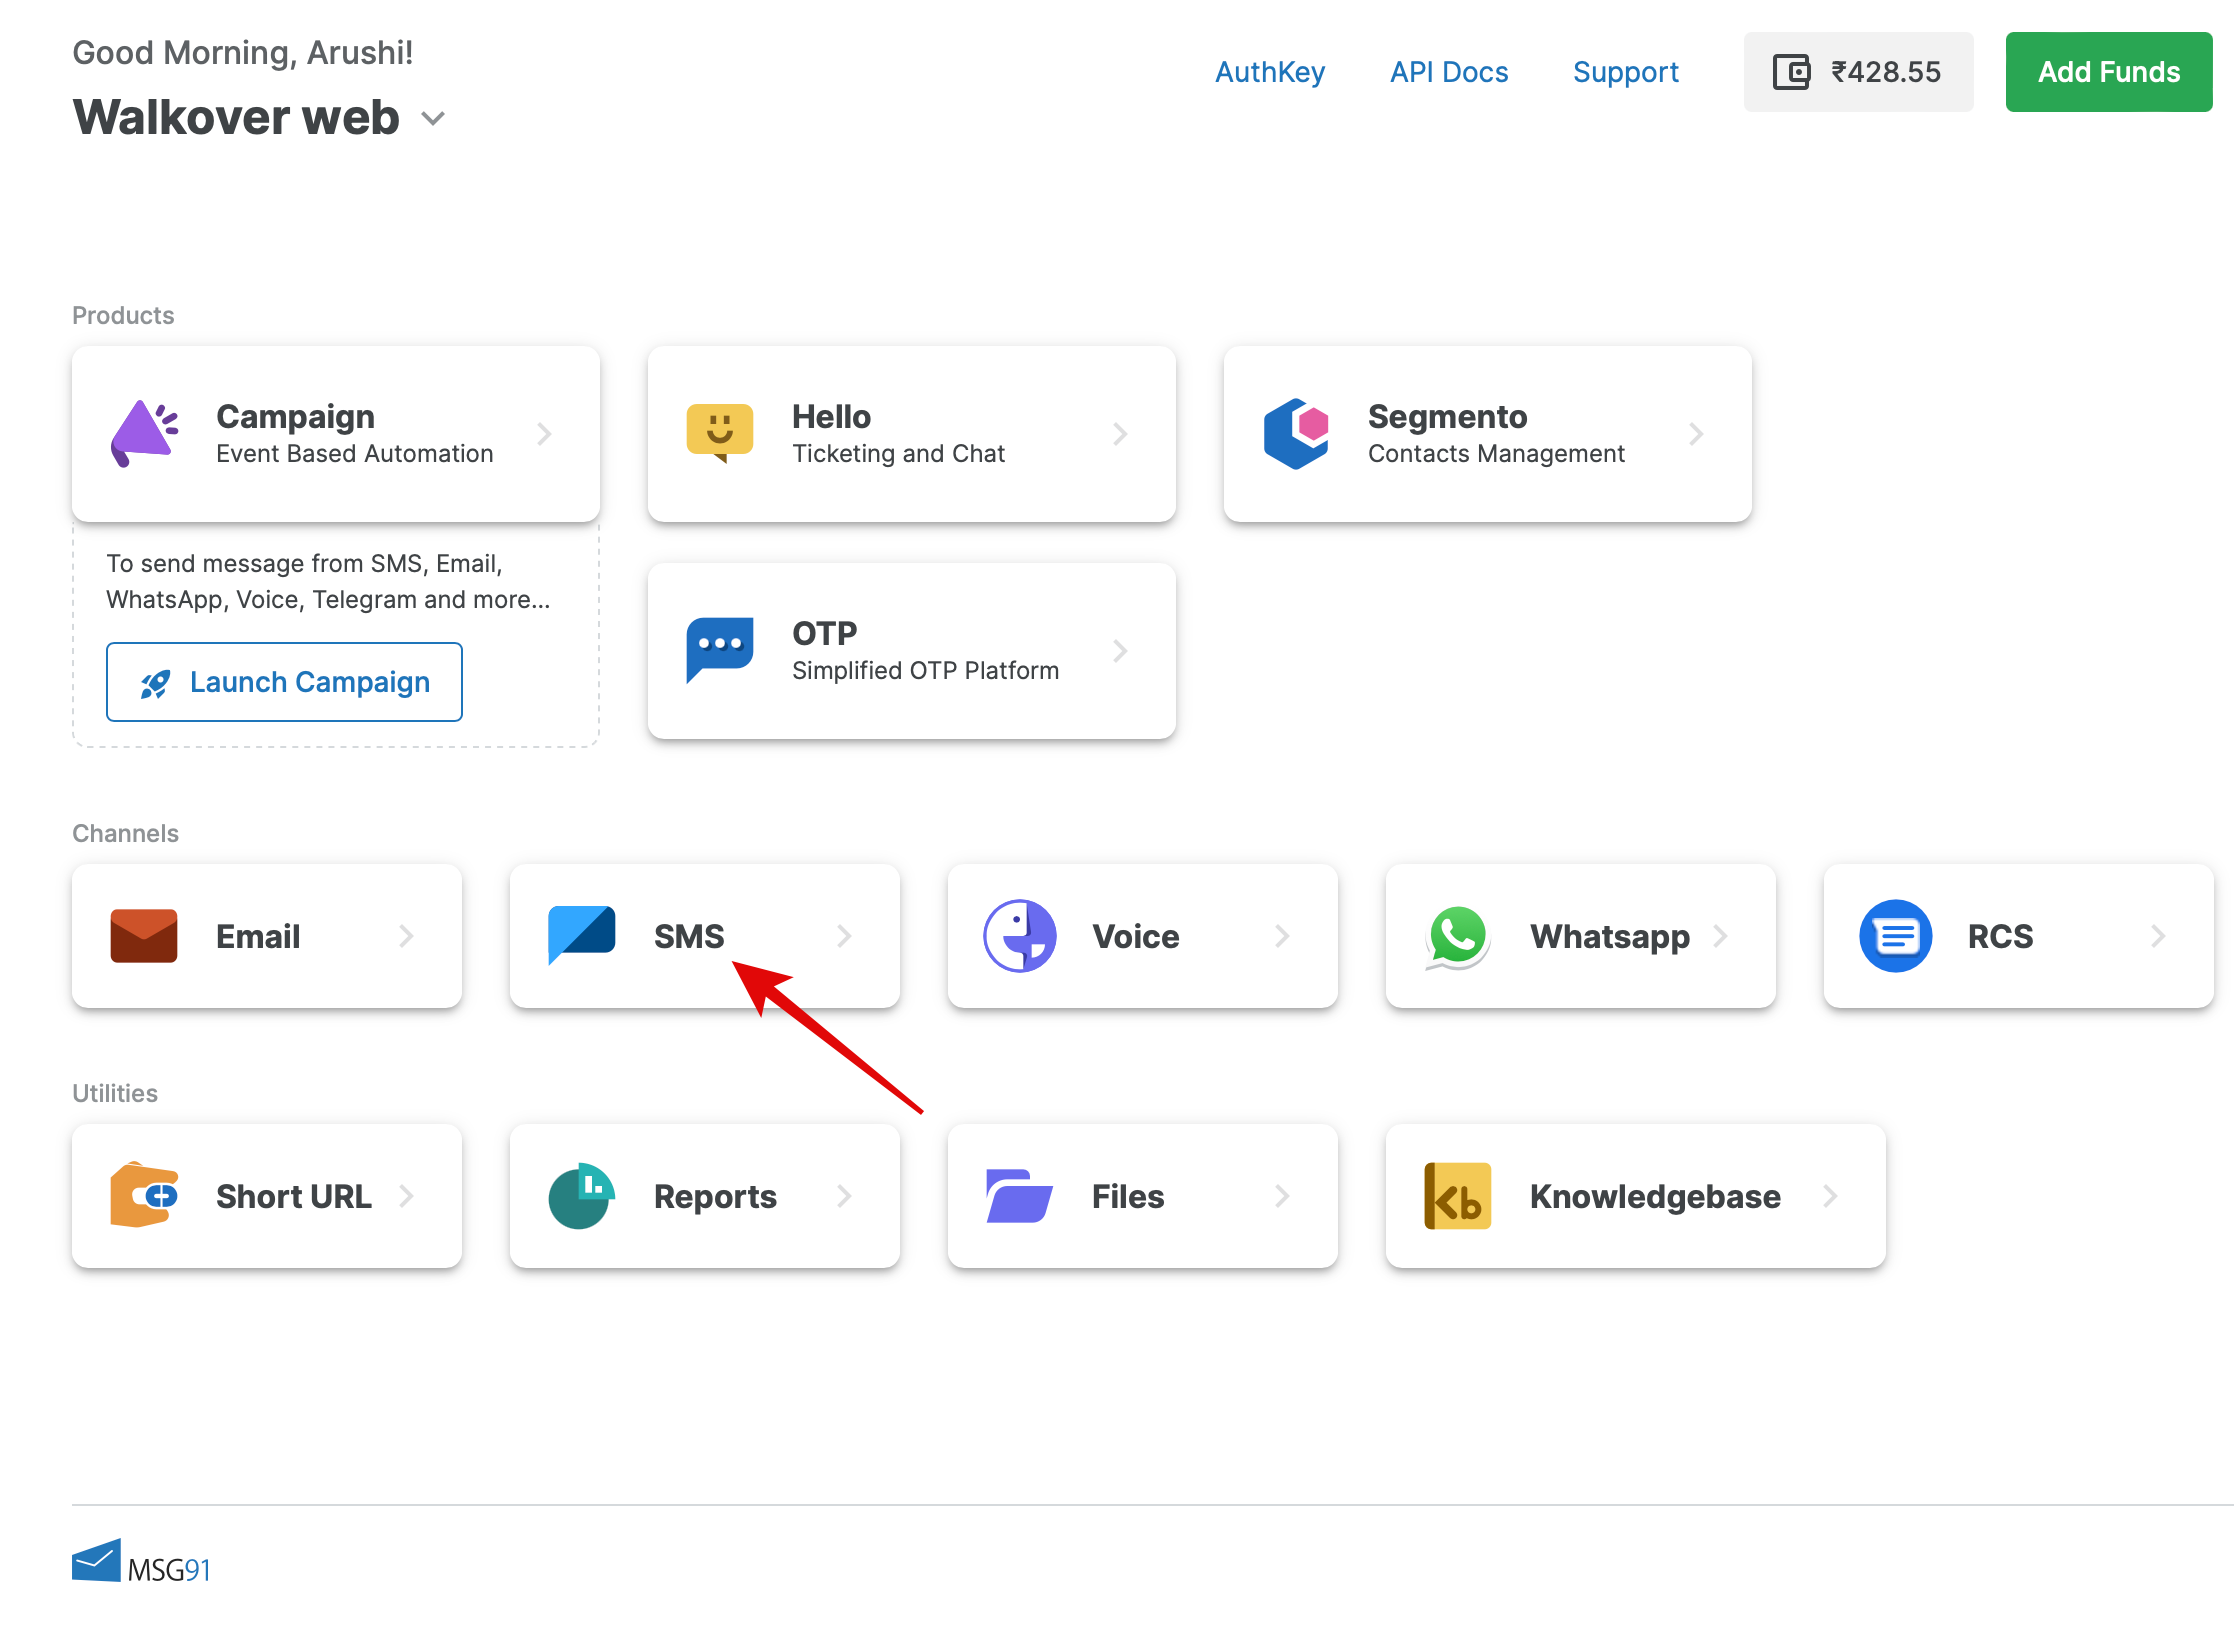
5. How to Get the Sender ID
Log in to the MSG91 account and select SMS.
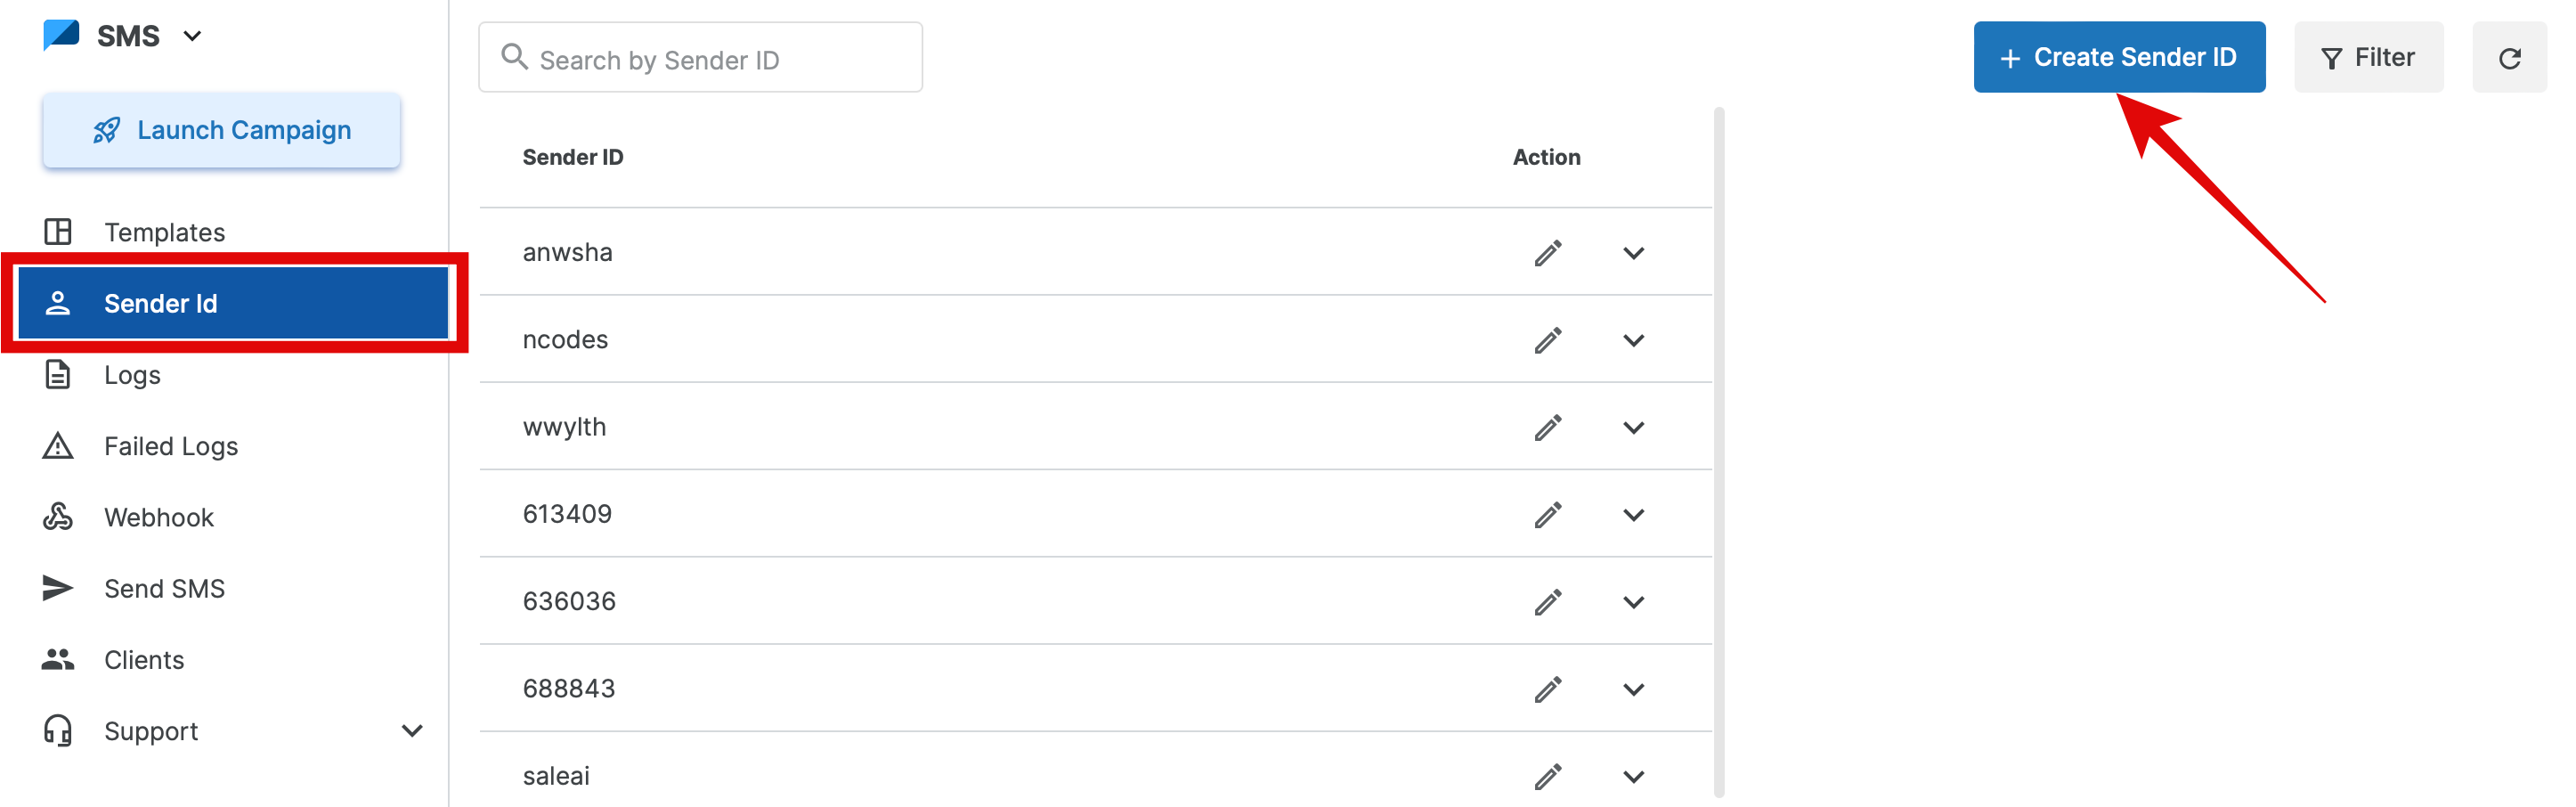
6. Create Sender ID
Select the Sender ID option from the sidebar and click Create Sender ID at the top.
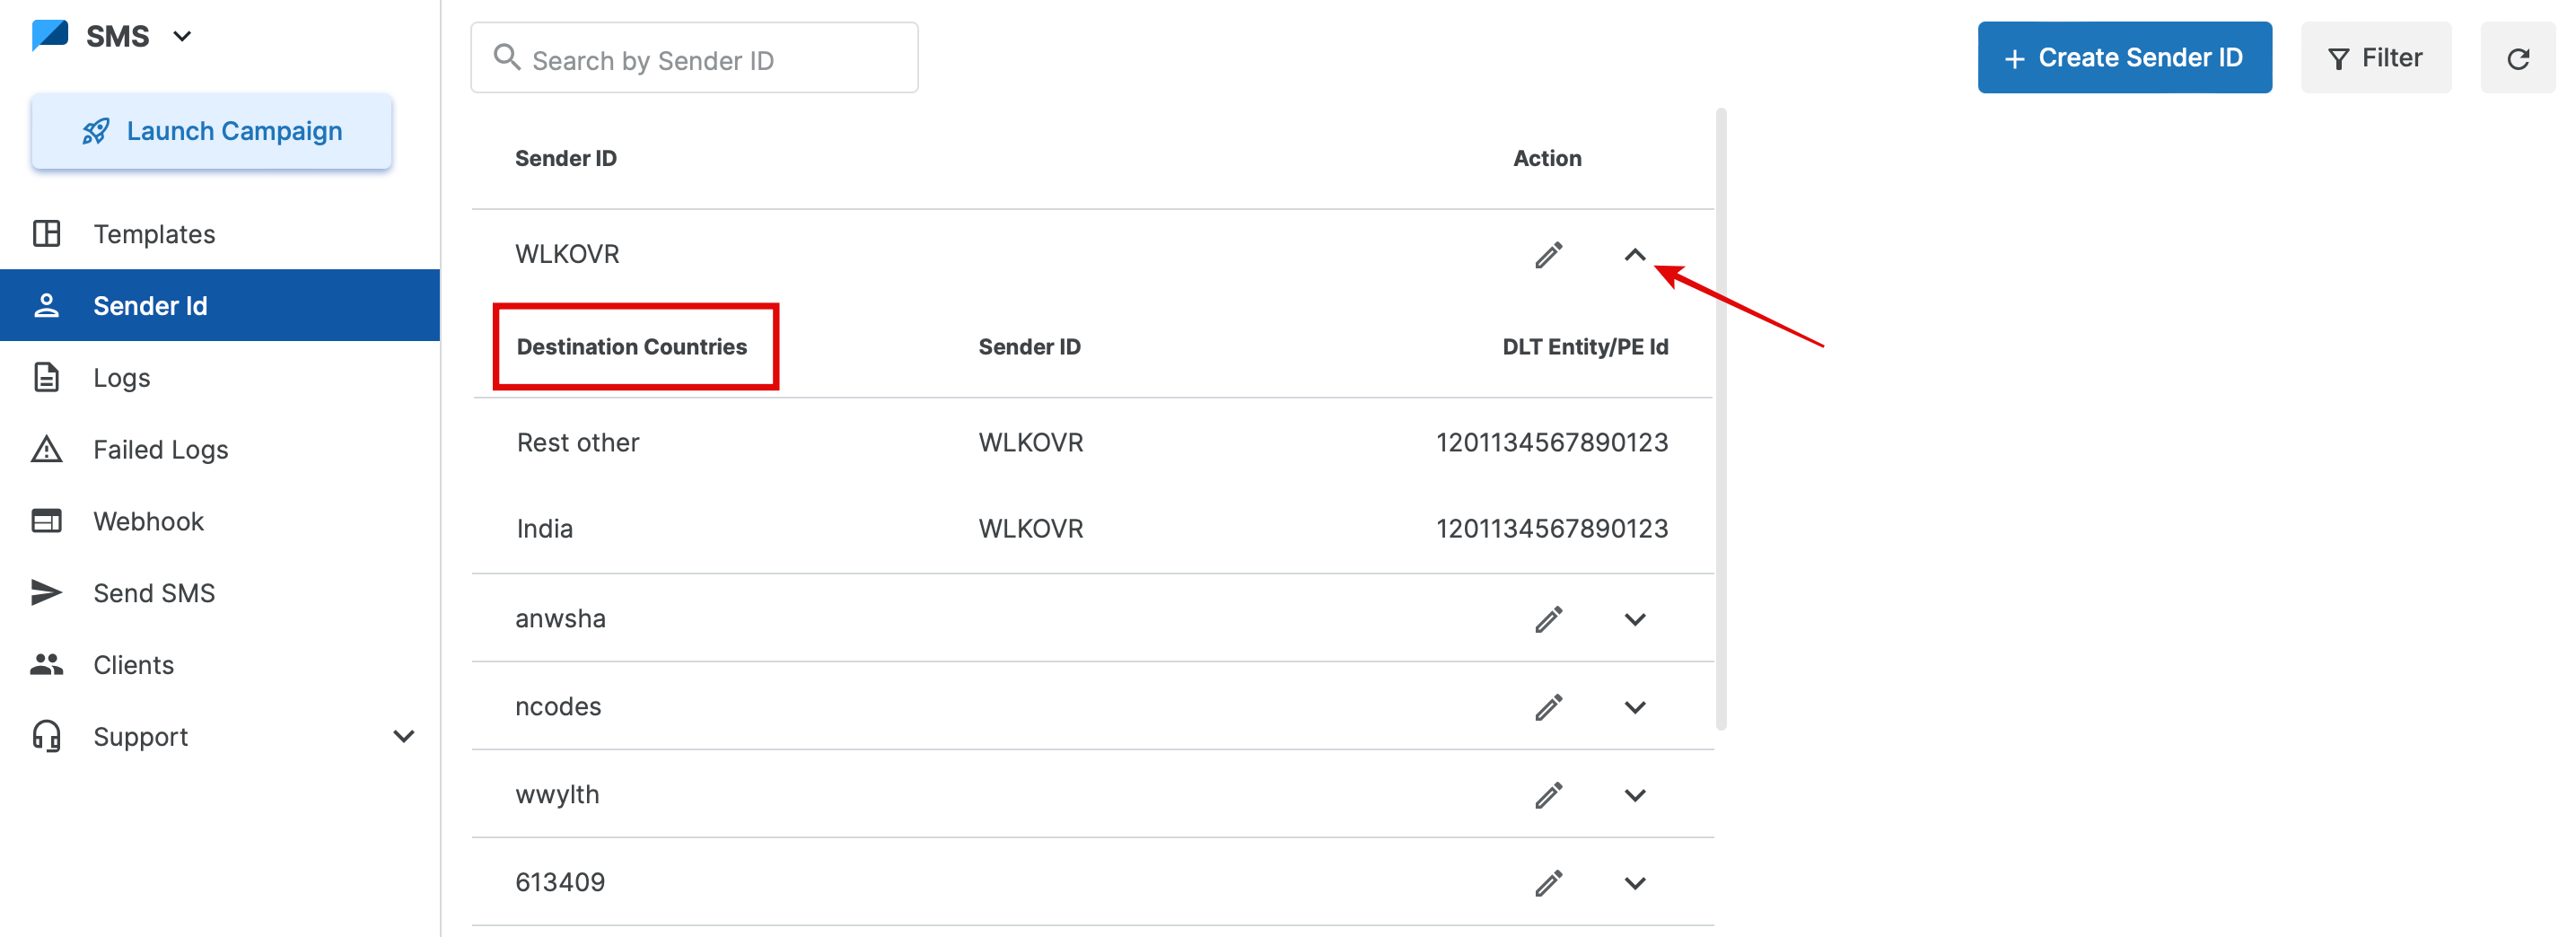
7. Select the Destination Country & Copy the Sender ID
- Choose the country in the "Destination Country" dropdown.
- Click Add More to include additional countries or tick the box if sending to more than 10 countries.
For India:
Add the DLT Entity/PE ID. As per TRAI regulations, all SMS content/header must be approved via DLT.
For International Destinations:
Refer to the Rules option, complete the required forms, download necessary documents, and submit them to [email protected].
Click Create. The Sender ID will appear below, showing details like PE ID and associated countries.
8. Paste the Sender ID & Admin Phone Number in the Admin Panel
Copy the Sender ID and Admin Phone Number and paste them into the Settings section of your admin panel.